Hello everyone! Christmas is nearing and so is the New Year! Well, I’m not all that excited anymore about the new year, especially after all that we’ve been through for the past two years. Alright alright, I’m not going to go on a rant about that, but Christmas is something that has always excited me before the new year. Although I never celebrated Christmas in my childhood as I was brought up in a traditional Hindu family that celebrated other Indian festivals, living abroad after getting married helped me learn about other cultures, traditions and festivals around the world. Having lived some precious years of my life in Brazil and being a mother of three beautiful Brazilian kids, I do celebrate Christmas every year at home. I love to decorate the Christmas tree and enjoy seeing it all lit up. I invite my family members and cut a Christmas cake followed by giving out presents to the children.
This year we will be traveling to India for Christmas, and won’t be able to thoroughly enjoy Christmas back there since we’ll be super busy and bustling with our own activities to tend to. So, I prepared these Christmas cookies in advance for my kids, to bring some of that Christmas nostalgia. This year even our Christmas tree was entirely ornamented with chocolates and candies! A childish yet fun-loving activity. Yes, it’s entirely decorated with sweets so that we can start another year of our lives on a sweet note! Get it? ;D
This is the first time I’m trying my hands on frosting cookies and I didn’t have any nozzles or other decorative tools at home. So, I just used ziplock bags and toothpicks to design my cookies. Do leave a comment below and let me know how you like this recipe or how your cookies turned out! I would appreciate your feedback 😀
Check out the recipes of other appetizers, salads, main courses, chutneys & pickles , quick meals and desserts on my blog!

Sugar Cookies Recipe:
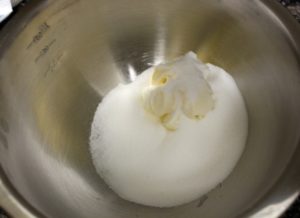
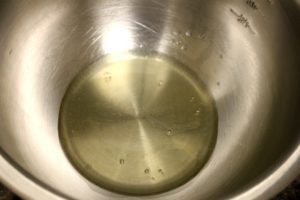
Combine unsalted butter and powdered sugar in a large bowl. Make sure your butter is at room temperature before you mix it with the sugar or else you will not get the perfect texture of the cookies. Now whisk them well for about a minute to make sure the butter is incorporated well into the sugar.

Add in eggs and vanilla essence and whisk them again for about 30 seconds at medium speed.

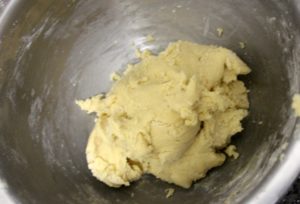
Add in all purpose flour, salt and baking powder and combine well, using the hand mixer.

Scraping out the dough from the sides of the bowl, fold in the dough.

Make sure everything is combined well and forms like a dough. If you’re using the stand mixer, then add the flour gradually at low speed for about 1 minute.
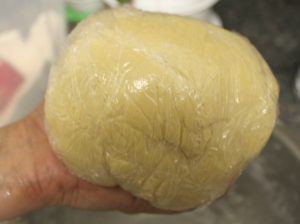
Don’t overdo the dough. Take some plastic wrap and cover the dough. Refrigerate it for about an hour. You can also keep it over night if you’re planning to make it the next morning.
Take the dough out of the fridge after 1-2 hours. Flour the surface or counter where you want to roll the dough. Take the plastic wrap off of the dough and place the dough on the dusted surface. Flour the dough and the rolling pin well. By dusting everything, there’s less of a chance for the dough to get stuck to the counter or to the rolling pin, which obviously makes the entire process so much easier.
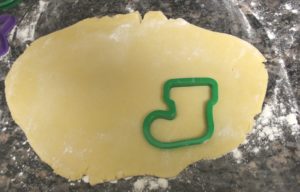
Start rolling out the dough. Roll the dough evenly on all the sides, dusting with the flour once in a while and rolling it to the thickness of 1/4 inch.This helps in easy removal of the dough after cutting. Take a cookie cutter, and cut the dough into your favorite shapes. Make sure that your cookie cutters are also dusted with flour. This helps in releasing the cookie dough easily from the cutters, without ruining it’s shape.

Transfer each cookie dough on to the baking tray lined with the parchment paper, leaving at least an inch of space in between. Gather the scraps of the dough, flatten them and roll it again to cut more cookies. If you want to use it for later, then it is recommended that you keep the dough chilled in the refrigerator.
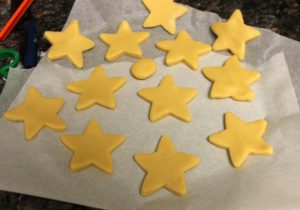
I cut some of them into various christmas themed shapes and some of them into stars.

Bake them in a preheated oven at 375 degrees F for 6-8 minutes. If you’re baking two trays at a time, then try to shift the trays up and down, front and back for every two minutes, to make sure that they are baked evenly on all the sides. Do not forget this step, if you want perfectly baked cookies. By the time the bottom of the cookies start to turn golden, which happens approximately 6-8 minutes in, take the cookies out of the oven. Keep them on a wire rack to cool them down to room temperature. Decorate the cookies using your favorite color of frosting and design it as per your choice. You can also buy the icing that is readily available in the stores or you can make it from scratch at home, as I did.
Follow the recipe for icing that is given below:
Click here to check the latest posts on my blog!
For the Icing:
Take a wide bowl and add the egg whites. For an eggless recipe, use milk instead of eggs.
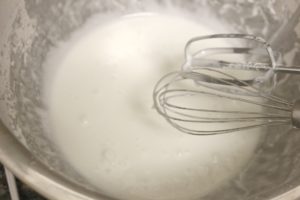
Add confectionary sugar or icing sugar and whisk it well. Add some lemon juice and keep whisking for about 5 minutes till you see the glossy and slightly thick texture of the frosting. Add in more lemon juice, if you need it to be more thin or more glossy. Whisk it till the frosting is white and glossy and good enough for spinning. If the icing runs off the edge, thicken the icing by adding a little more confectioners sugar. If the icing is too thick, add a little water to make it thin.
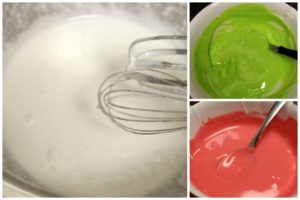
Divide the frosting into different bowls and add whatever food colors you want to add, to decorate to your cookies. As I’m making these cookies for Christmas I used red and green.Taking a zip-lock bag, fill in the frostings in each. Bring the frosting to one corner of the bag and close the seal. Twist and tie the top of the bag and make it into a cone. Make a small hole in the tip of the cone and design your cookies. Decorating the cookies is the most enjoyable part of this entire cookery, where you can have fun with different patterns and get super creative!
I know for a fact that I whole-heartedly enjoyed decorating these cookies. My kids were already in bed, when I started designing the cookies and when they saw the cookies in the morning, they were surprised. My younger one asked me, “Mom! If you’re done with clicking some pictures, can I take some cookies to school for my friends?” I couldn’t take good pictures in the night light, but I didn’t want to disappoint her. So I told her, “You sure can!”. And she picked the designs that she liked the most and went happily to school. It makes me feel good when I see the smiles on my kids faces. What about you? What are you planning to make for your family this Christmas?
Do share your pictures with me when you try my recipes out, as it always makes me feel good to see my dishes coming from your kitchens!
Have a Happy Festive Season folks!
Click here to check the latest posts on my blog!
![]()

| Prep Time | 20-30 minutes |
| Cook Time | 10 minutes |
| Passive Time | 60 minutes |
| Servings |
cookies
|
- 200 grams of unsalted butter (less than a cup)
- 1 cup of powdered sugar
- 2 eggs or 2-4 tbsp of milk for eggless recipe
- 1/2 tsp salt
- 1 tsp baking powder
- 1/2 tsp vanilla extract
- 2 1/2 cups all purpose flour
- 2 egg whites or 2-4 tbsp of milk for eggless cookies
- 3 cups or 330 grams of confectioner's sugar or powdered sugar sifted(add a little more if required)
- 2 tsps of fresh lemon juice
Ingredients
For Cookies
For Icing
|
|
- In a large bowl, cream together butter and sugar until smooth.
- Beat in the eggs and vanilla essence.
- Stir in the flour, baking powder, and salt.
- Scraping out the dough from the sides of the bowl, fold in the dough.
- Cover, and chill dough for at least one hour.
- Preheat oven to 375 degrees F.
- Roll out the dough on the floured surface 1/4 inch thick.
- Cut into shapes using any cookie cutter. Place the cookies 1 inch apart on cookie sheets.
- Bake 6 to 8 minutes or until edges are light golden brown.
- Cool 2 minutes; remove from cookie sheets to cooling rack. Cool completely, about 15 minutes.
For Icing:
- Take a wide bowl and add the egg whites. For an eggless recipe, use milk instead of eggs.
- Add confectionary sugar or icing sugar and whisk it well.
- Add some lemon juice and keep whisking for about 5 minutes till you see the glossy and slightly thick texture of the frosting.
- Whisk it till the frosting is white and glossy and good enough for spinning.
- If the icing runs off the edge, thicken the icing by adding a little more confectioners sugar. Conversely, if the icing is too thick, add a little water.
- Divide the frosting into different bowls and add whatever food colors you want to add and decorate your cookies.
